Autohighlight a Character
Detect and extract scenes that feature a specific character
.jpg)
eyepop.find-events.character-highlight:latest
Prompt
Analyze the provided video footage to determine if the specific target character is actively visible in the frame.
TARGET CHARACTER: A man wearing a bright red shirt
Read the following definitions carefully before making your decision:
character_highlight: This label is STRICTLY reserved for frames where...
...Run the full prompt in your EyePop.ai dashboard
Input
Video
Output
character_highlight
Image size
640x640
Model type
EyePop.ai VLM
FPS
1
How It Works
In video production, creating character specific social media edits or targeted promotional trailers requires autohighlighting specific characters on screen. However, manually searching through hours of multi-camera footage to log exactly when a target character enters and exits the frame is a slow and inefficient process. Being able to automatically detect and extract the scenes that feature a specific character is key for scalable content creation. The Find Events task on the Abilities tab can act as an automated video assistant to determine if a specific character is visible on screen and pinpoint those occurrences throughout the video's timeline.
For example, during a sitcom scene or a movie edit, a specific segment of footage should be flagged with the label character_highlight if it clearly shows the target character, such as a man wearing a bright red shirt. This includes wide shots where he is standing with others, action shots, and solo close-ups of his face.
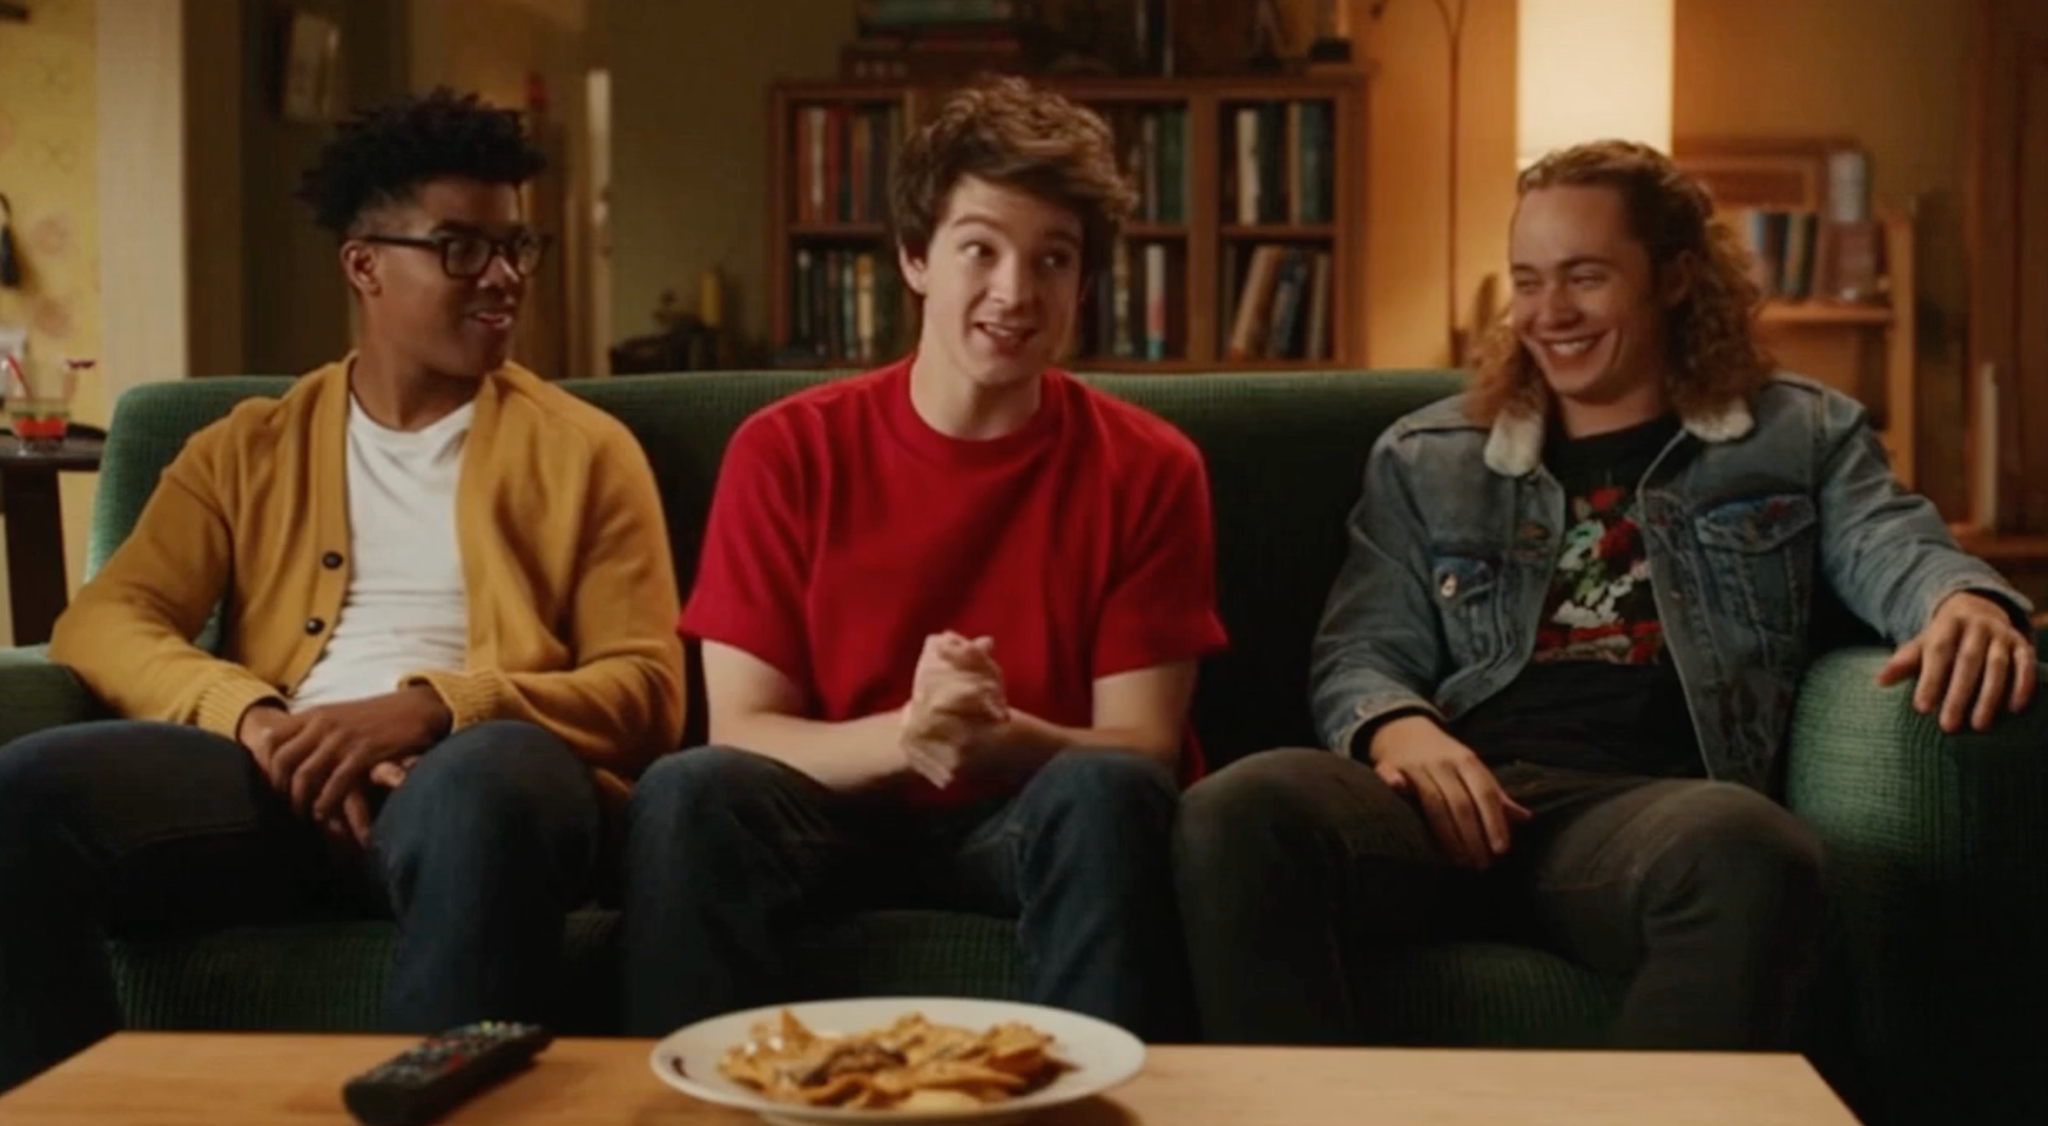
We will need to strictly separate these highlighted moments from scenes where the target character is absent. This means explicitly excluding solo close-ups of other characters, cutaways to the background, or moments where the target character has walked entirely out of the camera's view.
Our expected inputs are videos, and the expected output will be the label, character_highlight, identifying precisely when the target character is physically visible on screen..
UI Tutorial
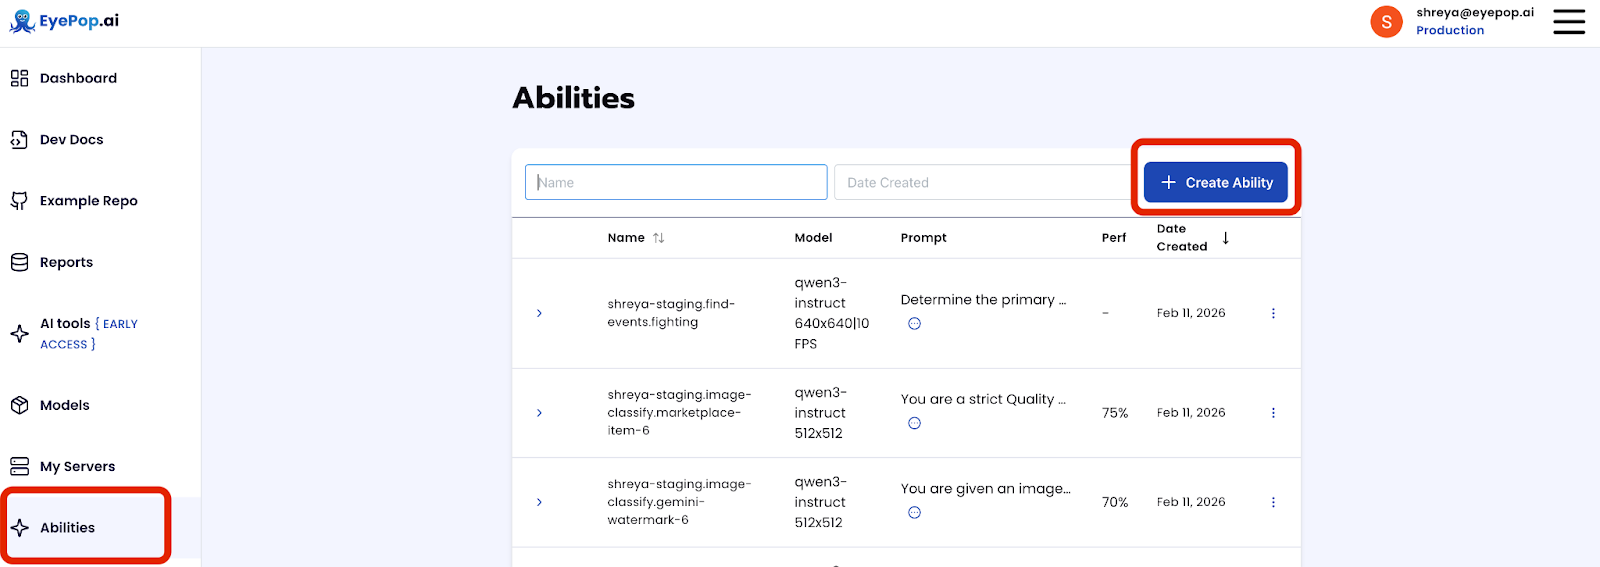
Step 1: Create an Ability
Go to the Abilities tab and select the button Create Ability. Get early access to Abilities here >
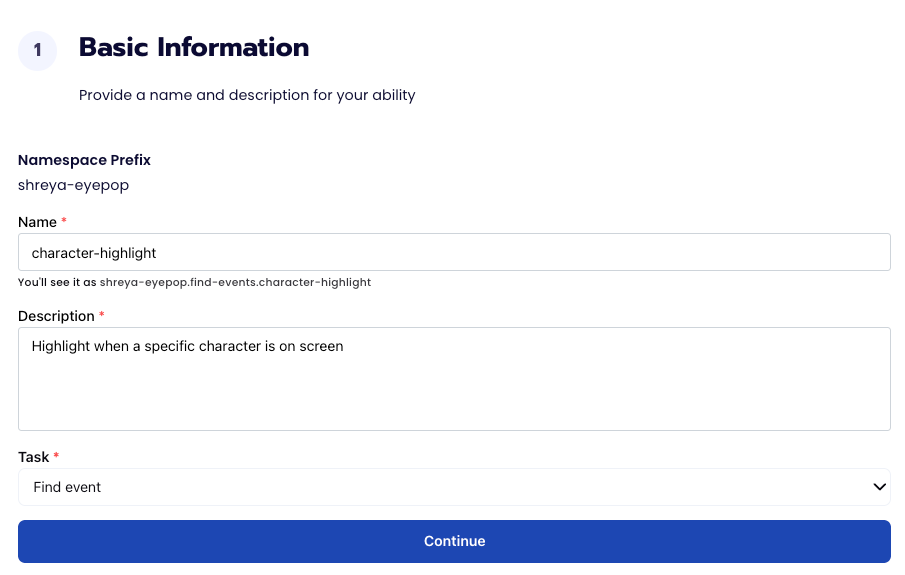
Fill out basic information about the ability such as its name and the description of the task itself. Since we are classifying events in a video, select the Task Type as Find Events.
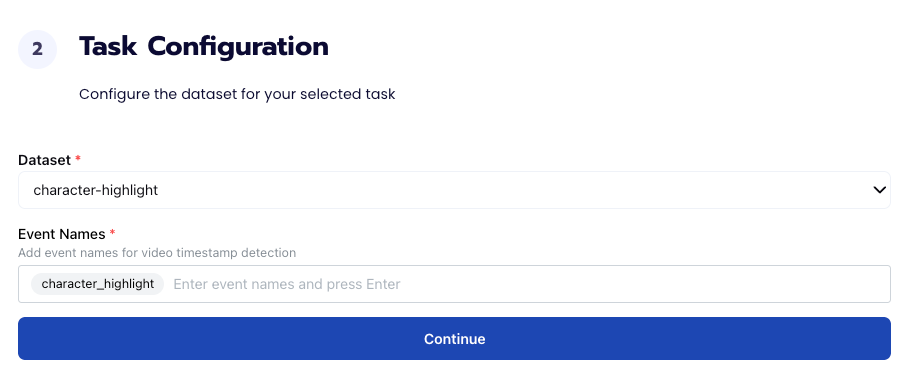
Step 2: Task Configuration
To configure the task, we need to select a dataset for the specific task. If you have already uploaded your videos in a dataset simply select the name of your dataset. However, if you haven’t already done so then select <New Dataset> and upload your videos, label them by identifying each type of shot in the videos, and create the label character_highlight in Event Names.
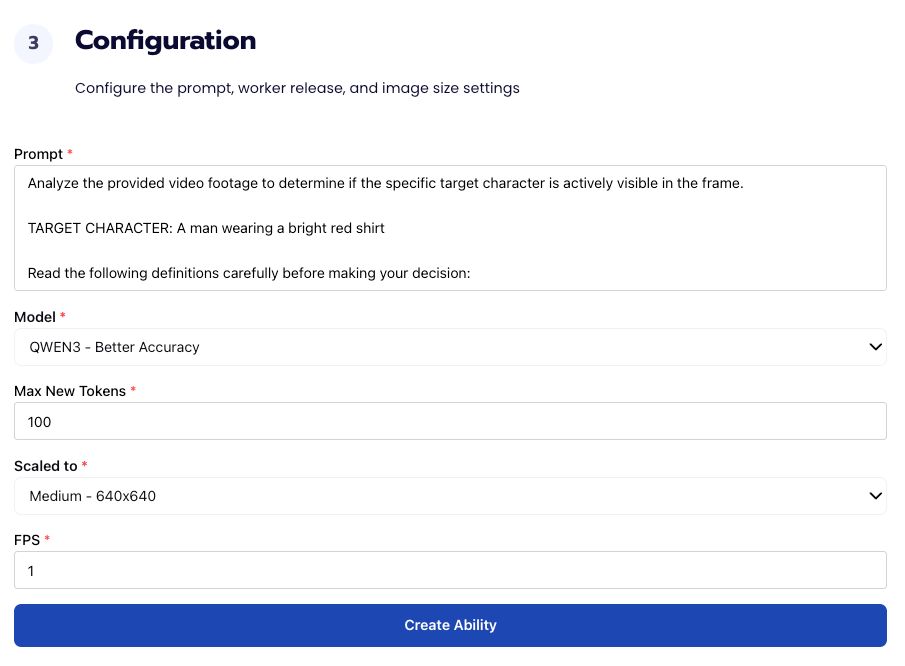
Step 3: Configuration
Our next step is to configure the prompt, select the model, and image size. For this use case, we recommend using the below prompt and settings for highest accuracy and best results. Update the prompt and TARGET CHARACTER with your specific character description.
Prompt:
Analyze the provided video footage to determine if the specific target character is actively visible in the frame.
TARGET CHARACTER: A man wearing a bright red shirt
Read the following definitions carefully before making your decision:
character_highlight: This label is STRICTLY reserved for frames where you can see the TARGET CHARACTER on screen. This includes wide shots where they are standing with others, action shots where they are moving, and solo close-ups of their face or body. If any part of the target character is in the frame, use this label. Only if the man with the red shirt is seen, then use this label.
other_scene: If you can NOT see the TARGET CHARACTER, the man with the red shirt, use this label. For any solo shots or empty background, use the label "other_scene".
Task:
Identify which category best describes the footage. Output ONLY one of the following exact labels: character_highlight or other_scene. Do not include any other text or explanation.
You must not output anything other than exactly "character_highlight" or "other_scene". Do not include punctuation, markdown formatting, conversational filler, or explanations of any kind.
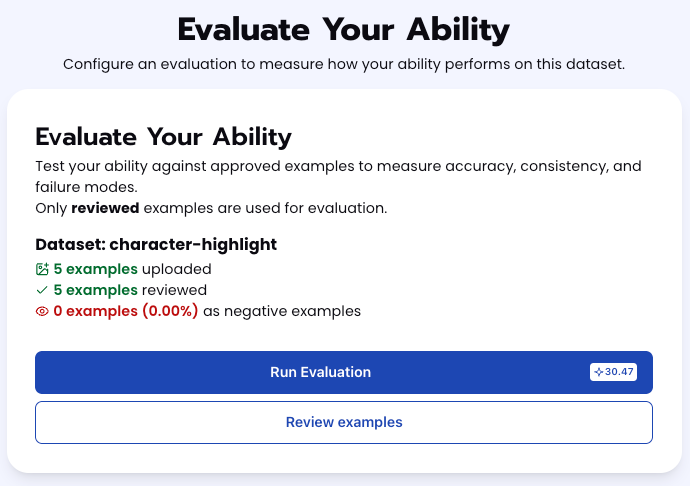
Step 4: Run Evaluation
To check how well the prompt does against the dataset, our next step is to run the evaluation. If needed, review the examples in your dataset to ensure all necessary images can be used in the evaluation.
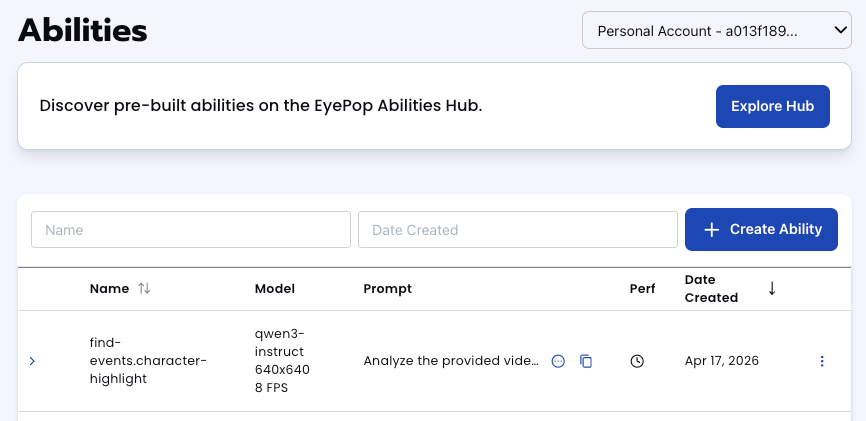
Step 5: Check Evaluation
All evaluations can be reviewed in the Abilities tab by clicking the dropdown arrow next to the associated ability-alias. Evaluations can take around 15-20 minutes to complete based on the size of the dataset.
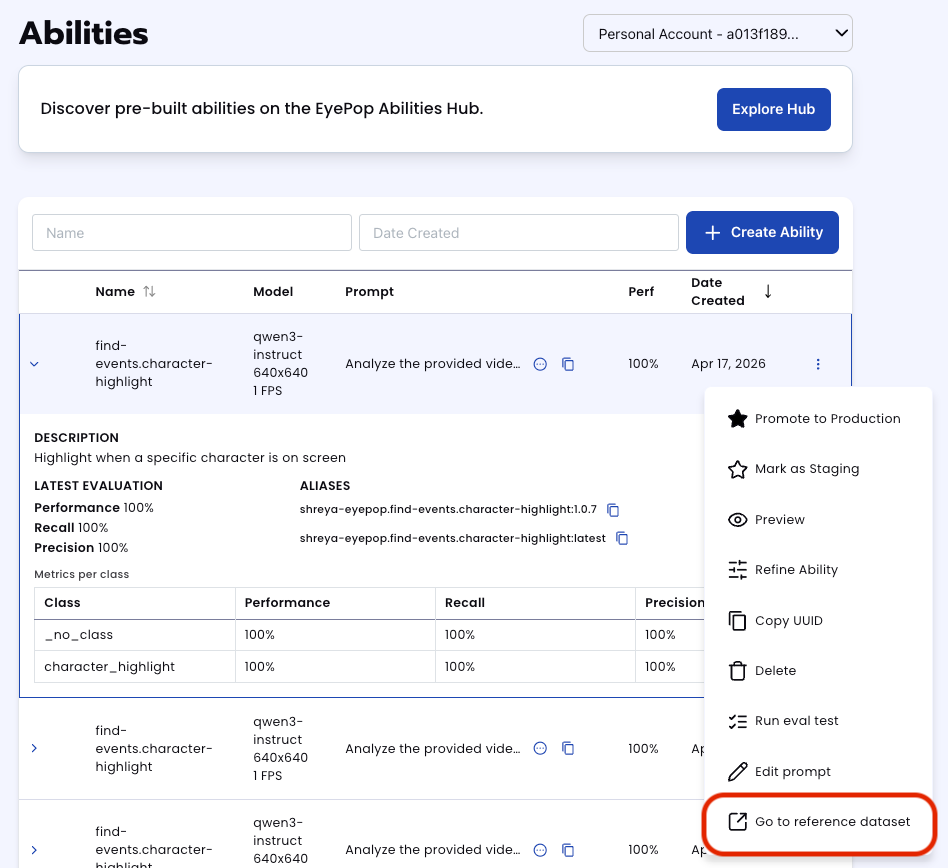
In addition to the performance, recall, and precision percentages on the abilities tab, you can see a visualization of what the model predicted by revisiting the dataset. Click on the three dots and select “Go to reference dataset”.
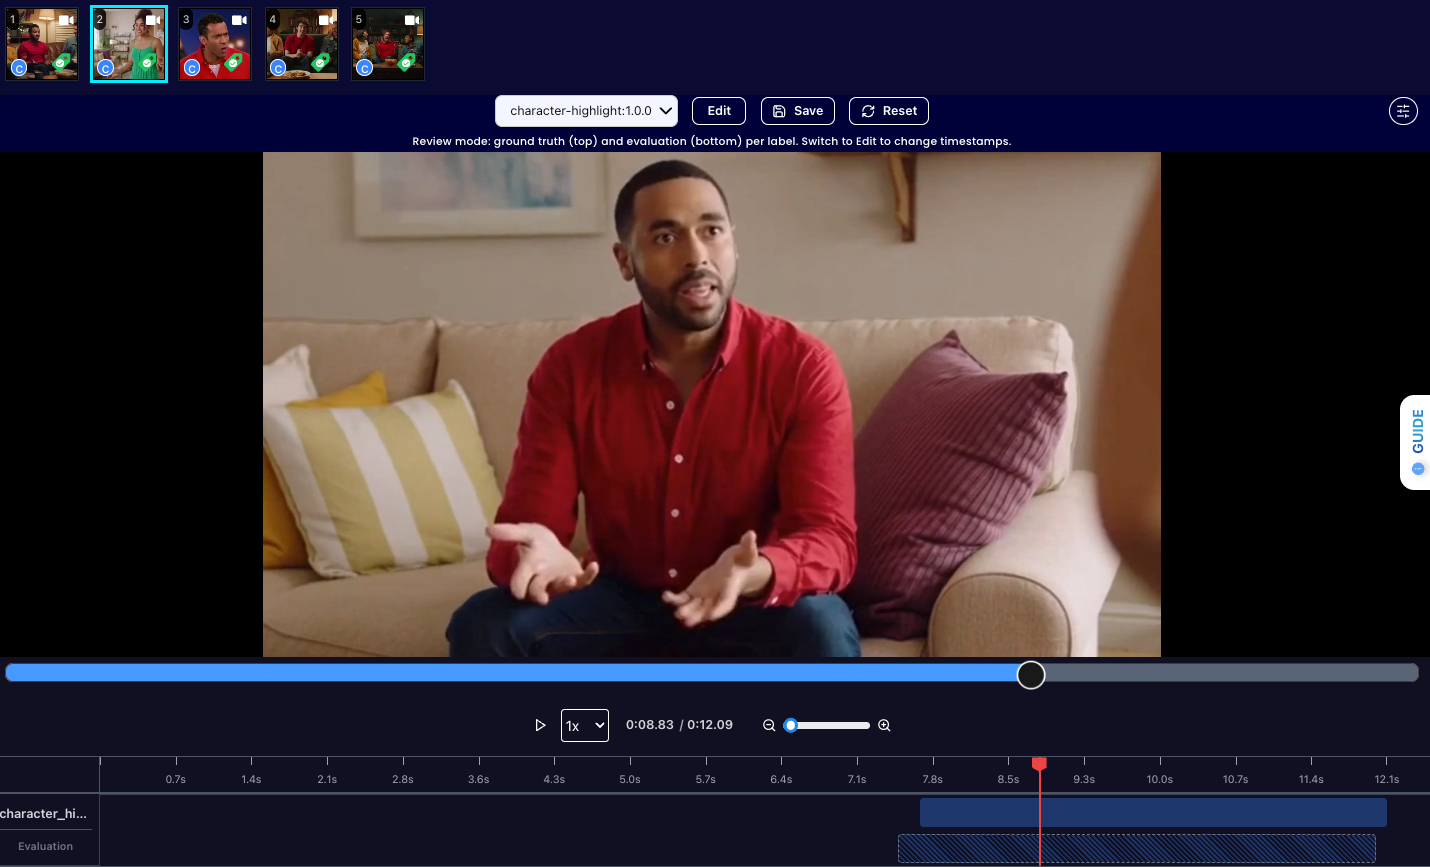
Select one of the videos in the dataset and click on the review button.

After running the evaluation you can see what the model labelled as character_highlight and compare it to what you labelled. With this, you can improve your prompts and thus improve your accuracy.
Get early access
Want to move faster with visual automation? Request early access to Abilities and get notified as new vision capabilities roll out.