Check Camera signal
The Check Camera ability automatically detects and timestamps security camera tampering events, such as spray paint obstruction, intentional blurring, or cameras being knocked out of position, enabling security teams to quickly identify compromised cameras without manually monitoring live video feeds.

eyepop.find-events.camera-signal:latest
Prompt
Act as a specialized industrial security analyst. Evaluate the provided frame from a security camera stream and output a binary operational status.
Analysis Criteria for Failure: Thoroughly check the frame for any of the following low-tech attacks or hardware failures:
Visual degradation: Diffuse blur (e.g., oil smearing), heavy haze, or loss of high-frequency sharp edges on the lens itself.
...Run the full prompt in your EyePop.ai dashboard
Input
Image
Output
normal or abnormal
Image size
512X512
Model type
EyePop.ai VLM
FPS
1/20
How It Works
With the reliance on video surveillance for building safety, maintaining the operational integrity of security cameras is key for preventing and identifying potential threats. This means security teams need to be able to instantly identify and respond to physical tampering, like spray paint or intentional blurring of security cameras, to maintain safety. However, manually monitoring hundreds of live video streams to catch the exact moment a camera is blinded or knocked offline is inefficient and unscalable for real-time security response. The Find Events task on the Abilities tab can act as a tool, determining if a video contains a specific camera tampering event or failure and locating those occurrences throughout the timeline.
For example, with industrial security camera footage, a segment of video should be flagged with the label abnormal if it clearly shows security camera being compromised, such as the lens being smeared with spray paint and/or the device being abruptly knocked to face the ceiling.
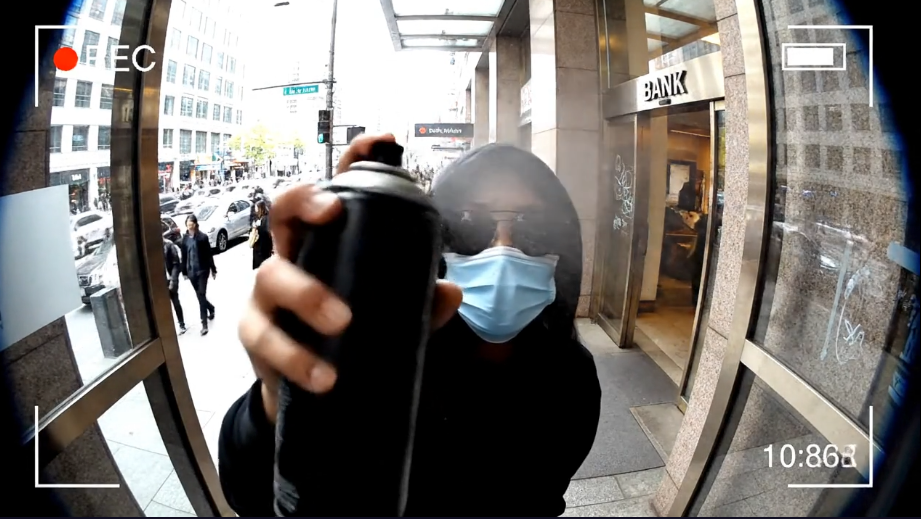
We will need to separate people walking by, standing directly in front of the lens, and normal changes from the exact active moments the physical camera hardware is actually intentionally altered or blinded.
Our expected inputs are videos, and the expected output will be the timestamps identifying exactly when the highlight sequence appears throughout the footage.
UI Tutorial
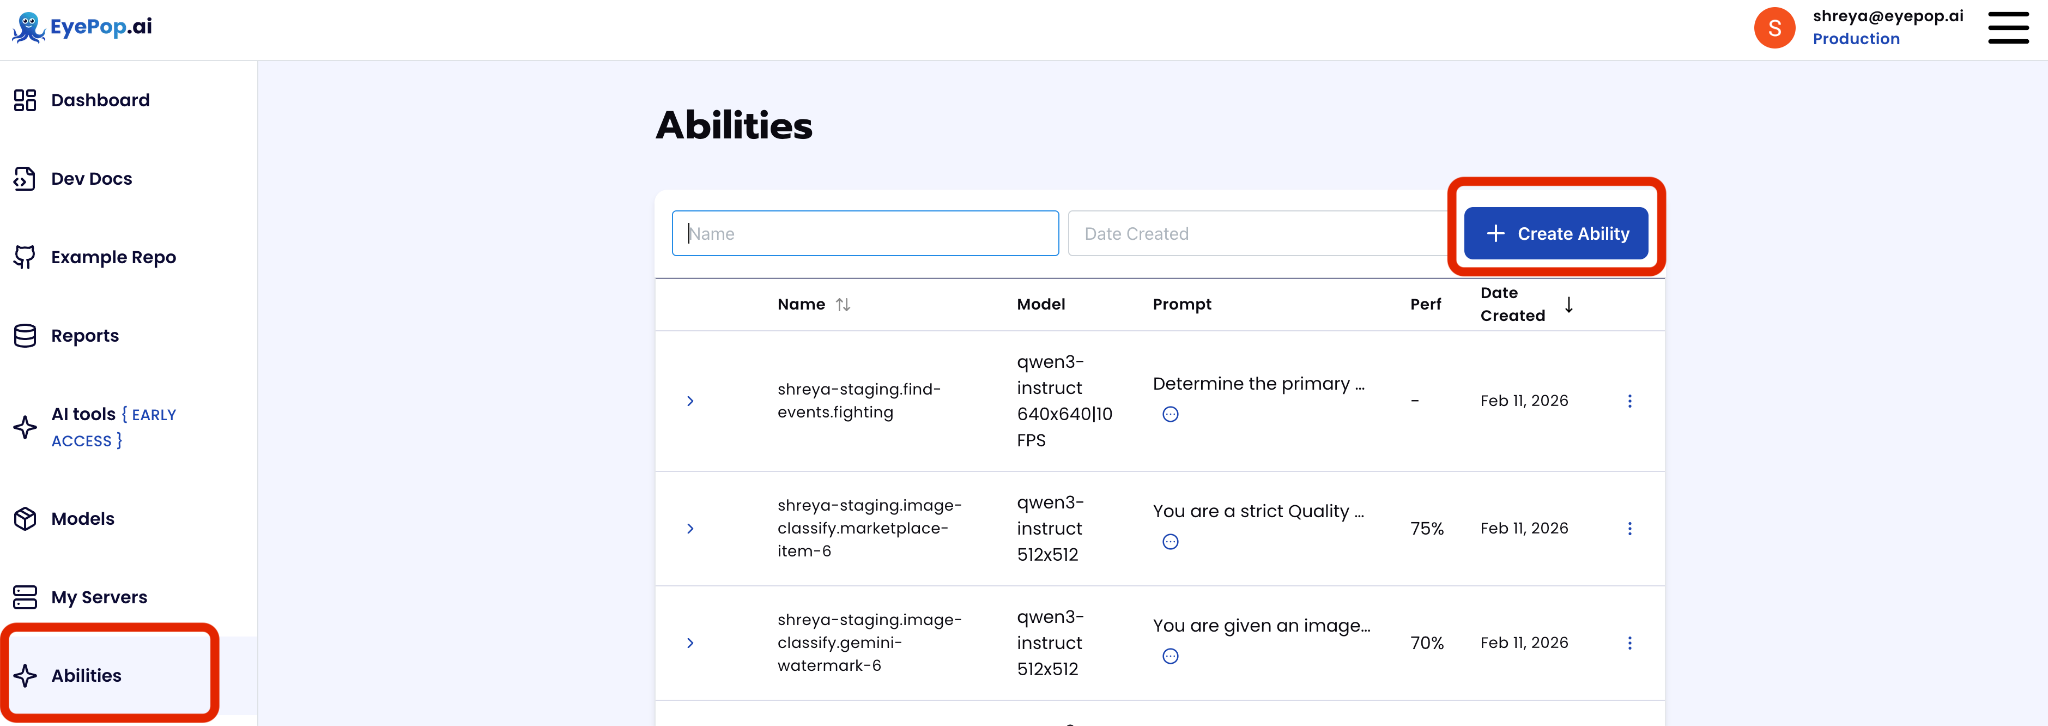
Step 1: Create an Ability
Go to the Abilities tab and select the button Create Ability.
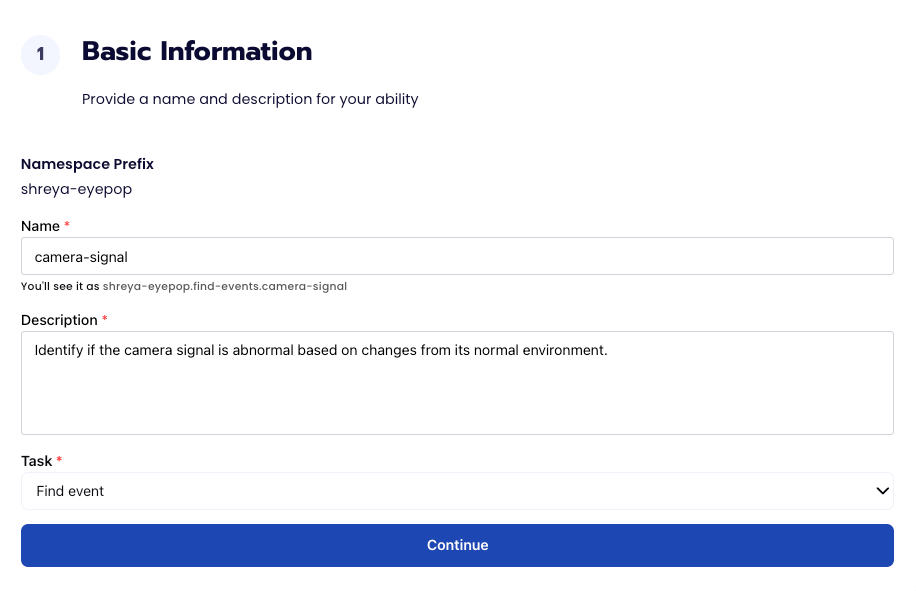
Fill out basic information about the ability such as its name and the description of the task itself. Since we are classifying events in a video, select the Task Type as Find Events.
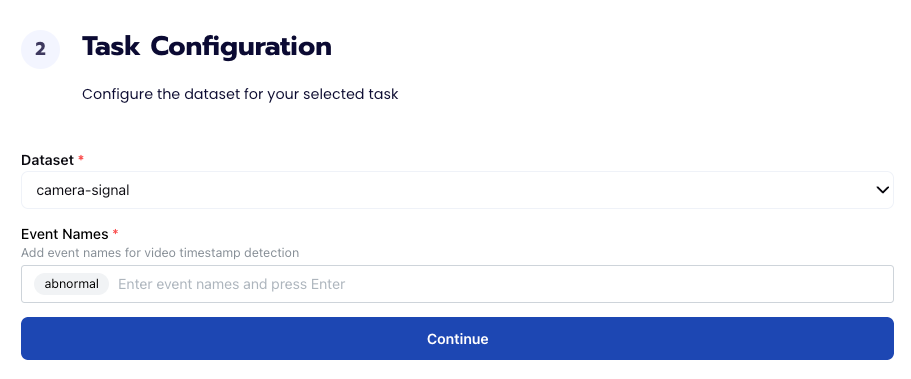
Step 2: Task Configuration
To configure the task, we need to select a dataset for the specific task. If you have already uploaded your videos in a dataset simply select the name of your dataset. However, if you haven’t already done so then select <New Dataset> and upload your videos, label them by identifying when the goal appears in the broadcast, and create a label abnormal in Event Names.
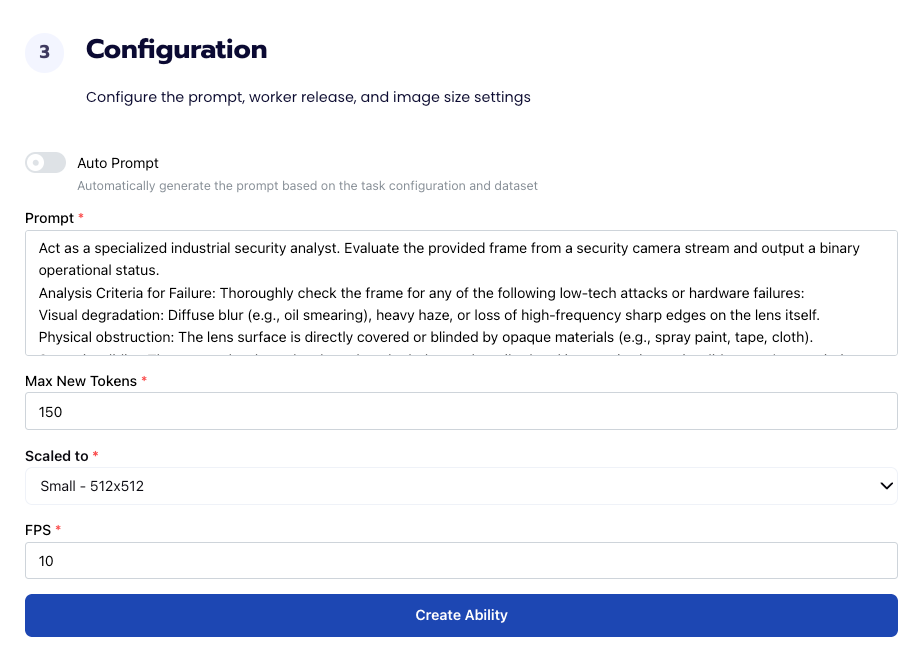
Step 3: Configuration
Our next step is to configure the prompt, select the model, and image size. For this use case, we recommend using the below prompt and settings for highest accuracy and best results. You can also select the auto prompt option if you would like to create a normal customized prompt based on the inputted dataset.
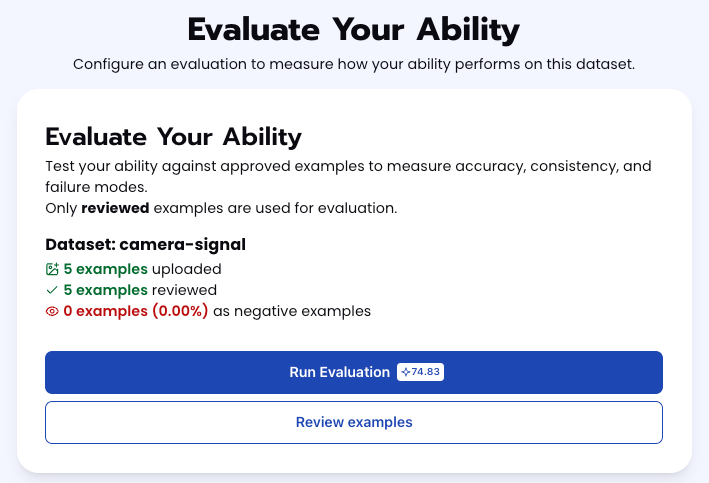
Step 4: Run Evaluation
To check how well the prompt does against the dataset, our next step is to run the evaluation. If needed, review the examples in your dataset to ensure all necessary images can be used in the evaluation.
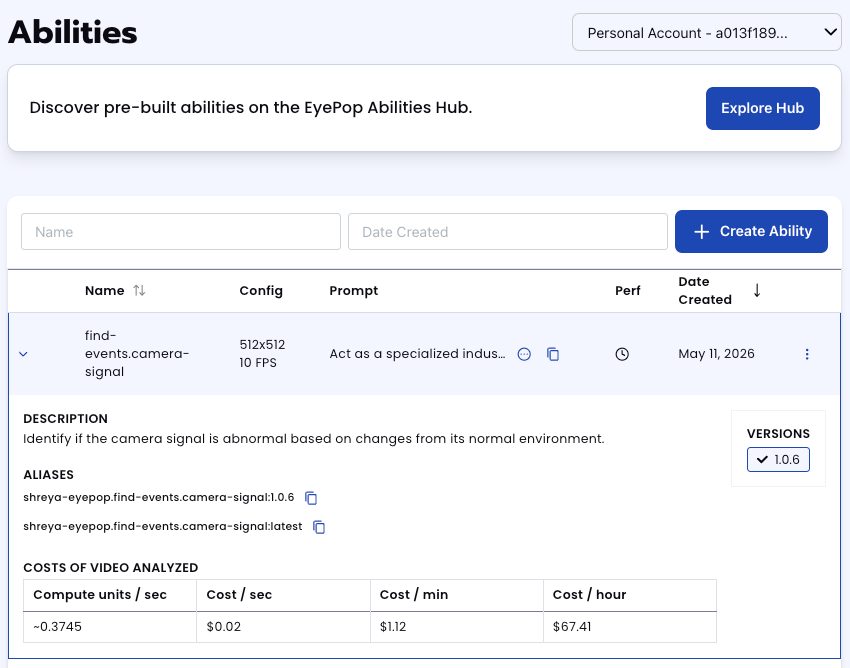
Step 5: Check Evaluation
All evaluations can be reviewed in the Abilities tab by clicking the dropdown arrow next to the associated ability-alias. Evaluations can take around 15-20 minutes to complete based on the size of the dataset.
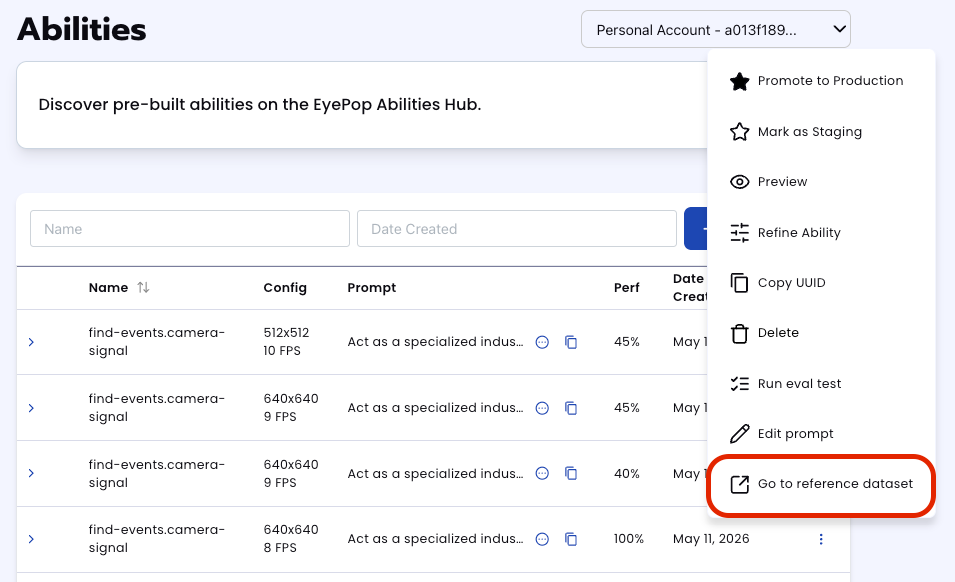
In addition to the performance, recall, and precision percentages on the abilities tab, you can see a visualization of what the model predicted by revisiting the dataset. Click on the three dots and select “Go to reference dataset”.
Select one of the videos in the dataset and click on the review button.
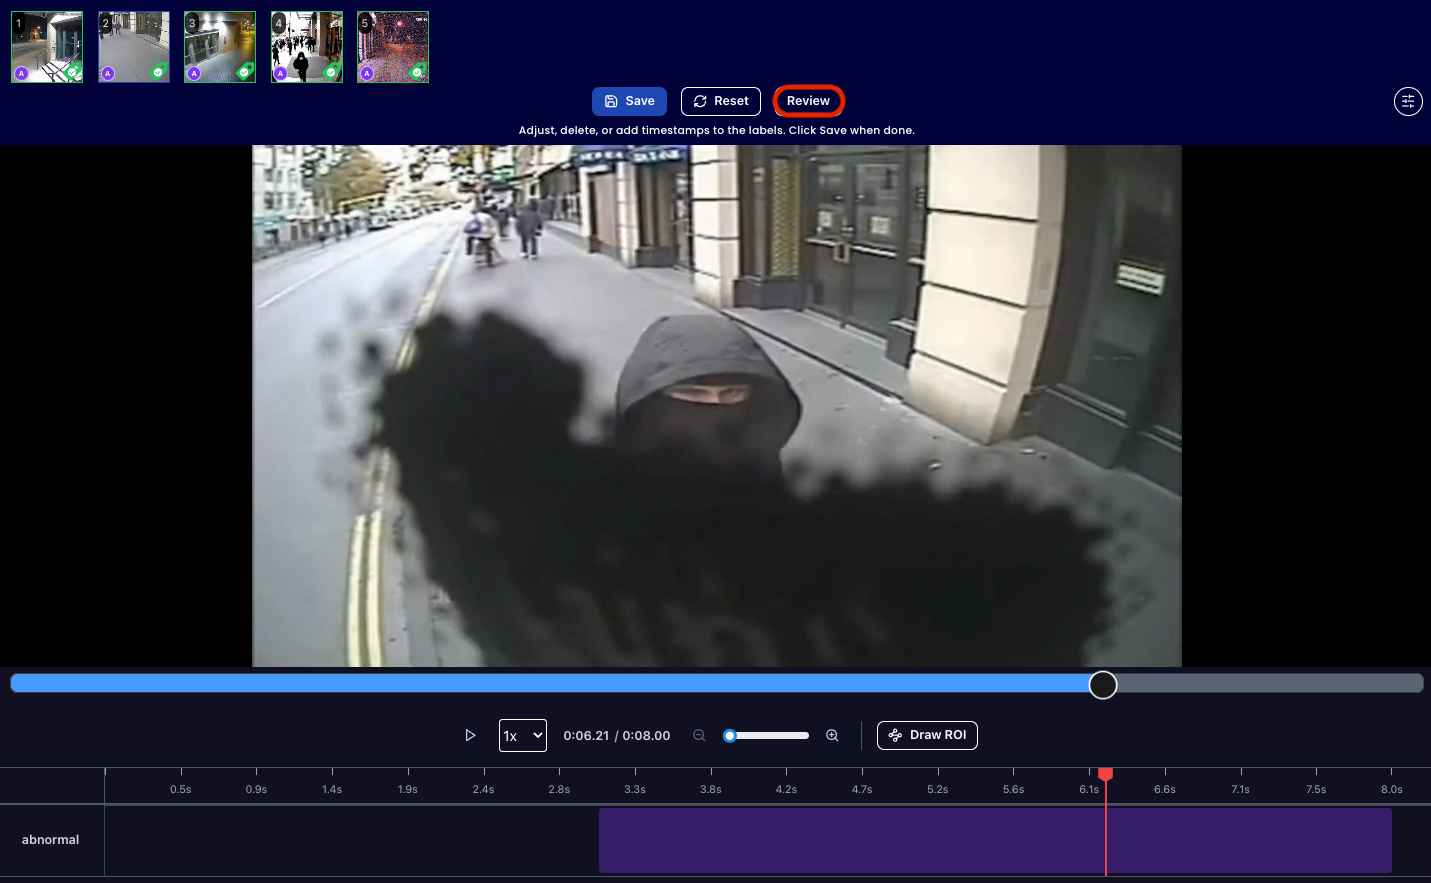
After running the evaluation you can see what the model labelled as highlight and compare it to what you labelled. With this, you can improve your prompts and thus improve your accuracy.

Get early access
Want to move faster with visual automation? Request early access to Abilities and get notified as new vision capabilities roll out.